
WePC is reader-supported. When you buy through links on our site, we may earn an affiliate commission. Learn more
Last Updated:
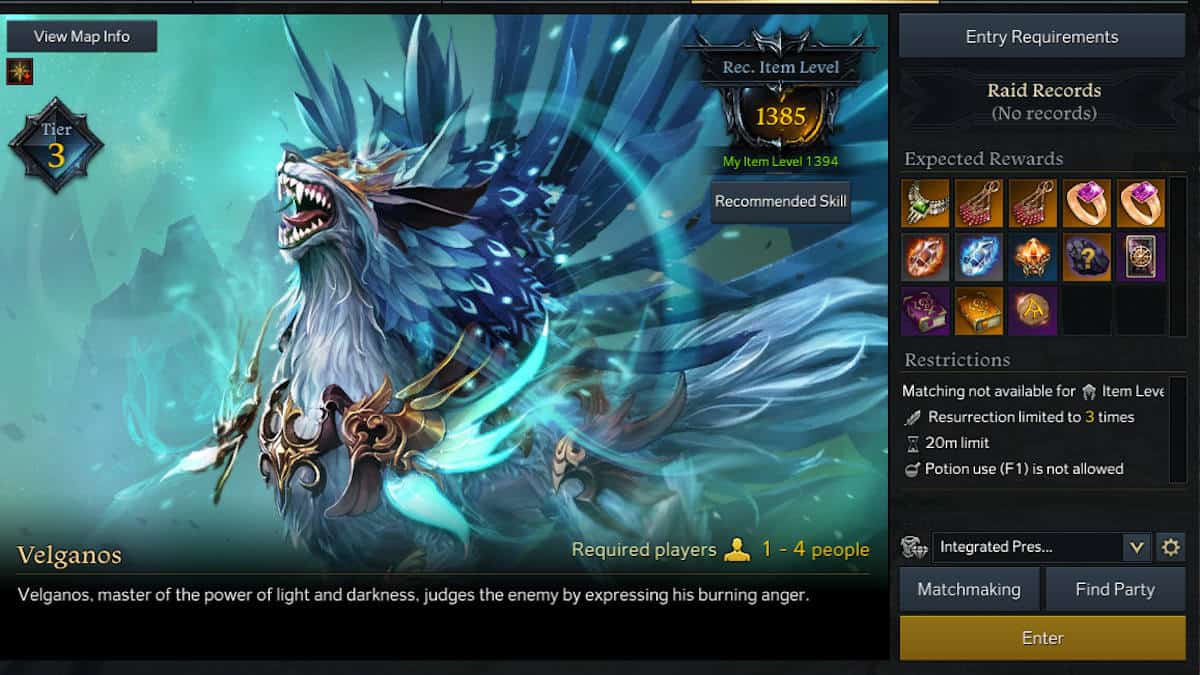
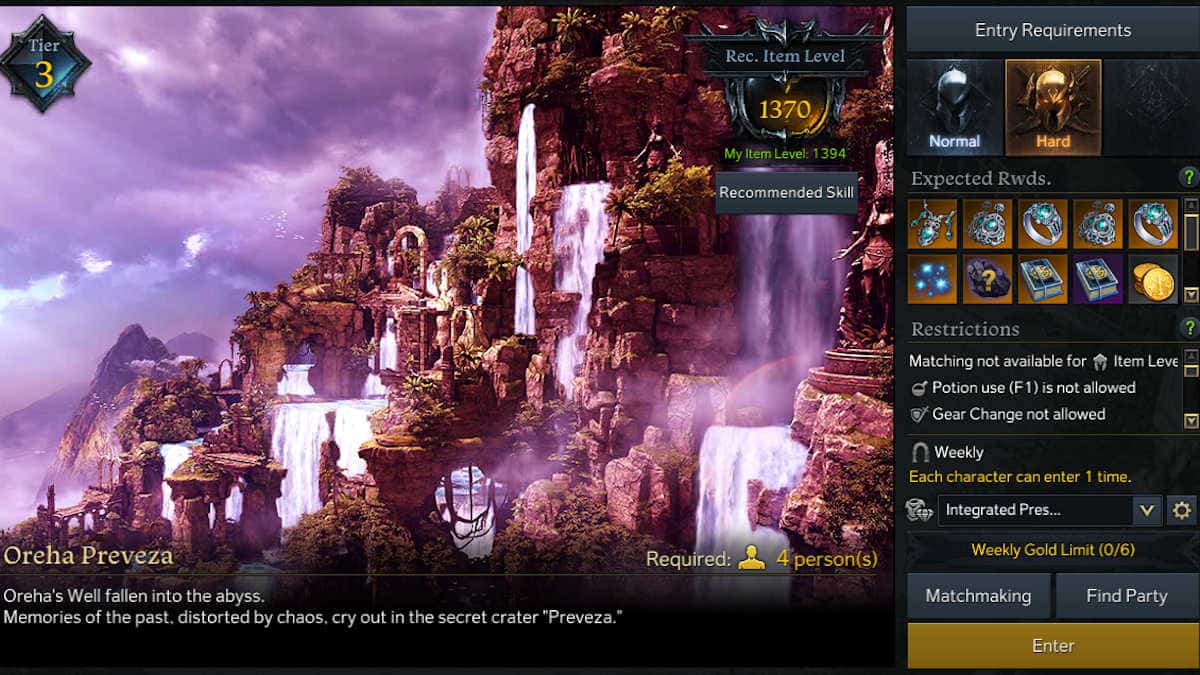
Oreha Preveza is Lost Ark’s second and final (at time of writing) Tier 3 Abyss Dungeon as well as the final in the Oreha’s Well tab of Abyss Dungeons. Like Oreha Preveza’s predecessor – Aira’s Oculus – this Abyss Dungeon also requires four players to enter. These four players will each need to have completed all of the previous Abyss Dungeons and have reached item level 1340 to attempt normal difficulty and have reached item level 1370 to attempt hard difficulty. You can quickly group up for this dungeon using the ”find party” or “matchmaking” features. There is no difference in the mechanics for the different difficulties; only the damage output, as well as health point pools, are affected.
Lost Ark Oreha Preveza Abyss Dungeon Mechanics and Tactics
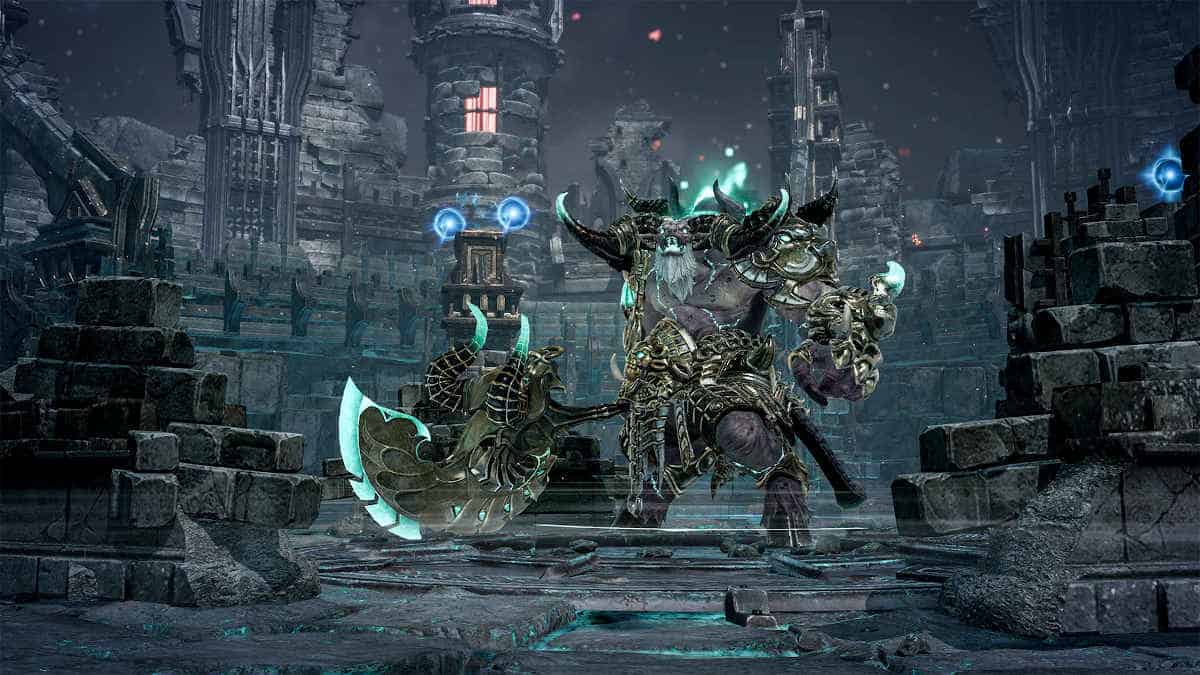
Angry Moguro Captain tactics, tips and mechanics
Angry Moguro Captain will not be much of a challenge for veteran Lost Ark players. Whilst he has a couple of heavy hits, once you understand how these major abilities work he can be easily defeated each run with as few resources used as possible.
- Set up – Whirlwind grenades are very useful at the beginning of this fight as the Stagger can be really tough to get through. Time stop potions are also great if you are having trouble with the Spin and Slam mechanic.
- Stagger – At the beginning of the fight, Angry Moguro Captain will have a purple stagger bar underneath his health bar as well as a golden buff. This buff means that Angry Moguro Captain deals more damage and stuns players with every third attack. To remove this buff, you need to hit Angry Moguro Captain with as many stagger abilities and whirlwind grenades as you can. You need to do this as fast as possible as the stagger bar will lock when the Burning Arena mechanic begins.
- Burning Arena – Angry Moguro Captain jumps back and swings his axe around him in a wide circle. The entire arena is then covered in fire, and a safe zone of water appears around Angry Moguro Captain. You need to stay close to Angry Moguro Captain in order to avoid burning in the fire. However, be sure to keep an eye out for the Spin and Slam mechanic that will follow shortly.
- Spin and Slam – Angry Moguro Captain flexes his arms and lets out a roar before rapidly spinning his axe in a circle. You need to get out of the water ring and into the fire when he does this attack. If there is any member of the party still in the ring when Angry Moguro Captain stops spinning, he slams his axe into the ground doing massive area of effect damage. If you do get caught in the ring, this is the moment to take your Time Stop Potion, as the slam attack will kill most players.
- Totems – Throughout the fight, Angry Moguro Captain will spawn totems around himself. You want to quickly switch your focus and destroy these totems. Each totem gives Angry Moguro Captain ten percent more damage and reduces player damage by ten percent if left alive. Shortly after destroying each totem, whichever player got the final hit is stunned. You need to hit your teammates to free them, so make sure to stay close to your party after destroying a totem.
- Counter – Angry Moguro Captain’s eyes begin to glow red as he beats his chest. This animation can be quite difficult to spot, but if you manage to spot it, the whole party needs to stop damaging him immediately. If anyone continues to hit Angry Moguro Captain during the animation, he will unleash another devastating area of effect attack.
Albion Consumed by Madness tactics, tips and mechanics
Albion can be a really tough fight if you go in unprepared. Albion has three different forms he can be in, lightning, grounded and a mixed state. Albion also has multiple abilities with the potential to wipe the whole party.
- Set up – Again, you will want to bring whirlwind grenades along as Albion has a pretty tough Stagger check. Swiftness robes are great for this fight if your class is one with a slower movement speed. Panaceas can also be useful if you find yourself struggling with the Clown.
- Stagger – Throughout the fight, Albion will attempt to empower his current form. Albion raises his wings, and the air in the arena begins to surge towards him. A yellow stagger bar will also appear, which you need to deplete. This is a great time for stagger abilities and whirlwind grenades. If you pass the stagger check, Albion will transfer to a different state. If you fail, however, Albion will become empowered and use more area of effect attacks.
- Clown – Throughout the fight, Albion summons a dark clown. This clown will then begin to chase down one of the players. If you are the clown’s target, you need to keep away from him. If the clown catches his target, he will release a large area of effect darkness attack, restricting the whole party’s vision. If you are not being hunted by the clown, you should switch your focus to it and prevent it from reaching its target. Panaceas are useful here to cleanse the darkness, or if you bring a Paladin along, they can also do this.
- Grounded Form Wipe Ability – Albion flies up into the air, and the edges of the arena begin to swirl, dealing damage and forcing the players into the centre. Four red area of effect zones will then quickly flash up. For this ability, simply remember where is safe for each attack and move quickly between them. You can use swiftness robes here if you need to.
- Lightning Form Wipe Ability – Albion flies high into the air and area of effect cone attacks begin to appear, as well as red orbs which follow players, stunning them on contact. You need to dodge these attacks, especially the orbs, and wait for a safe zone to appear in the centre of the arena. This is where those swiftness robes come in for you slow boys! If all four members of the party do not make it into the safe zone, the party will wipe. Likewise, if Albion uses this ability whilst a party member is already dead, he will wipe the party. Make sure to be extra careful if he is in Lightning form.
- Lightning Beams – Albion flies backwards into the air, then shoots multiple beams of lightning ahead of him. This deals a lot of damage, so when you see him fly up, make sure to get to his sides or behind him.
- Angles of Protection – At 12 health bars remaining, Albion will move to the centre of the arena and raise his wings over his head protectively. Red rings will then appear around him, with a small star floating over each. Floating above Albion will be a large golden star. The number of angles the star above Albion has determines which of the red areas will now be safe. The star can have either four, six or eight angles. Once you see how many angles the golden star has, move to a red ring with the same star above it. Only one player can fit in each safe zone, and you will be wiped if you are either not in a zone, or in an incorrect zone. Albion will repeat this three times; the number of angles is not repeated, so once you have seen a four, for example, it cannot be four again. There will only be a maximum of four safe zones, and their locations will be random, so if you are safe and see another, make sure to ping it for your teammates.
That concludes this Lost Ark Oreha Preveza Abyss Dungeon Normal and Hard guide. We hope you found it useful! Why not check out some of our other awesome content and guides over at the Lost Ark Hub?