For as long as he can remember, Charlie has always been interested in computers and gaming. It all started with the Sega Mega Drive and then evolved into PC gaming in his early teens. CS 1.6 was his first go at competitive gaming which soon evolved into CS:Source and now CS:GO - a game that he still plays (almost exclusively) today. Throughout that period he has also been a keen PC builder and enthusiast - dedicating a large portion of his time to the craft. My current rig is an ASUS 5700XT with AMD's Ryzen 3600X.
WePC is reader-supported. When you buy through links on our site, we may earn an affiliate commission. Learn more
Last Updated:
When you throw away your credit card, you don’t usually just want to just toss it in the trash. You probably burn it, cut it, or shred it first. Whatever your method, the fact is that you want that card to be unrecoverable and gone forever so that your information is kept safe.
Similarly, you shouldn’t just quick format your hard drive to get rid of the information, as isn’t actually how you clean an SSD. And when it comes to formatting an SSD, it can be harmful to do a full format.
So, how do you erase an SSD so that no one else can recover it?
In order to securely erase data from an SSD, you’ll need to go through a process called “Secure Erase” using either your BIOS or some form of SSD management software.
But first, in order to explain how this works and how to securely erase your data, we need to understand how an SSD works and how a standard drive format works. If you already know about SSDs and just want to know how to wipe a solid state drive, then skip the next section.
How an SSD Works
Traditionally, storage drives were mechanical spinner drives (HDDs). They have magnetic discs called platters, and actuator arms that move across the platters to access the information written to them.
Since they’re mechanical, this is a slow process. The actuator arms have to manually move across the platters to access the storage causing a small delay when retrieving data.
This was suitable for a long time and is still okay for certain types of files, but now, we have flash-storage based hard drives: Solid State Drives (SSD). Thusly named because there are no mechanical parts that move.
The SSD was a large leap forward in storage technology, as it allowed significantly faster read/write speeds.
But how does it work, and why is it so much faster?
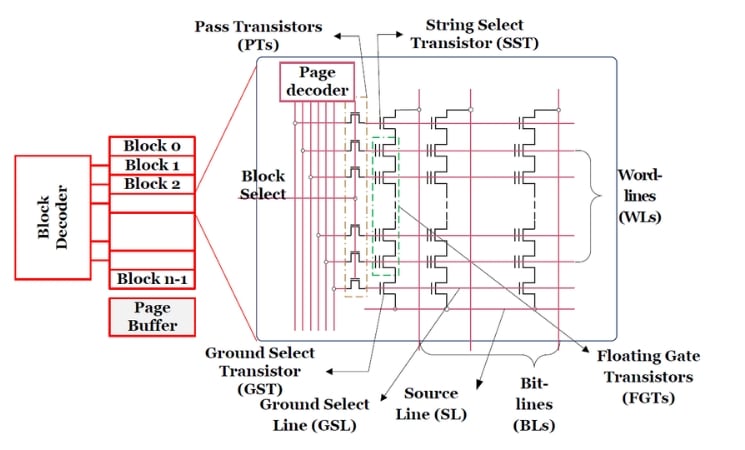
The storage of an SSD is made up of small transistors and wires, with signals constantly going to them. These signals will turn into 1s and 0s on your SSD. Eventually, these pile up and make up the data that’s being written to the drive.
Transistors make up cells, and cells make up pages. This is where the data is stored. The more pages the drive has, the more room you have to write data to.
Chances are, you’ve been using a form of flash storage for years: your USB thumb drive. USB flash drives use a similar technology to store their information.
Formatting
So here’s where we start to get into the common misconception: formatting erases your data; this is not how you wipe an SSD or HDD.
It does NOT erase your data. When you’re formatting a drive, you’re actually stripping the old file system that tells the OS where data is stored and tells it where to store future data.
When you run a quick format your file system is removed, and a new one is written.
When you run a full format your file system is removed, and a new one is written. It also checks for bad sectors, which is why it takes so much longer. This is harmful to SSDs as they have a limited amount of read/write cycles, and a full format will go through cell by cell and write/rewrite data to it.
So in essence, you’re taking the old roadmap for data, and replacing it with a fresh new edition. When you format the file system with a new one, it actually just tells the OS that the old data is free space to write new data to.
The data is still there, but it’s now marked as available to have new data written over it.
The same thing happens when you delete files from your computer as well. The data is still there, the space is just considered free real estate to be overwritten.
There are many pieces of software and methods to recover data from a formatted drive; in fact, it’s really not that hard.
Securely Erasing Your Data
In order to securely erase data off of your SSD, you’re going to need some sort of software. In most cases, the manufacturer will offer software specifically for their brand of drives.
Here are the links to the software for the three top hard drive manufacturers:
The SSD that I’m going to be wiping today is my Western Digital Blue M.2, so I’ll be using WD’s SSD Dashboard software. After that, I will also show you how to use your BIOS to wipe your SSD (Note: each BIOS is different and you will need to read your manual to find the settings on your motherboard).
Western Digital SSD Dashboard
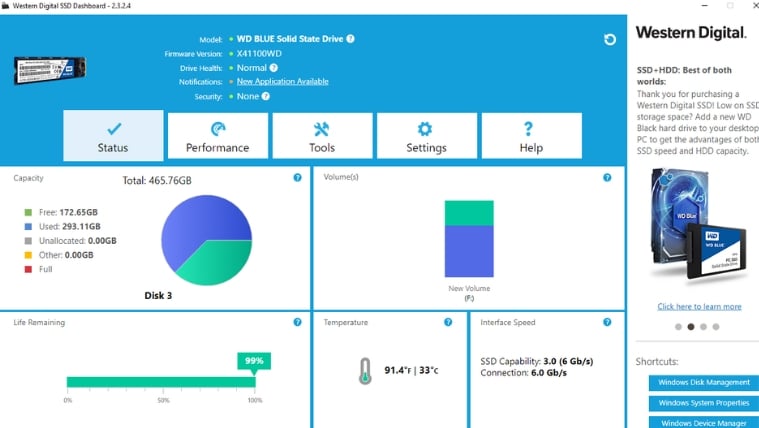
The first thing you’ll be greeted with after installing WD’s SSD Dashboard is, well, the Dashboard itself which will look like this:
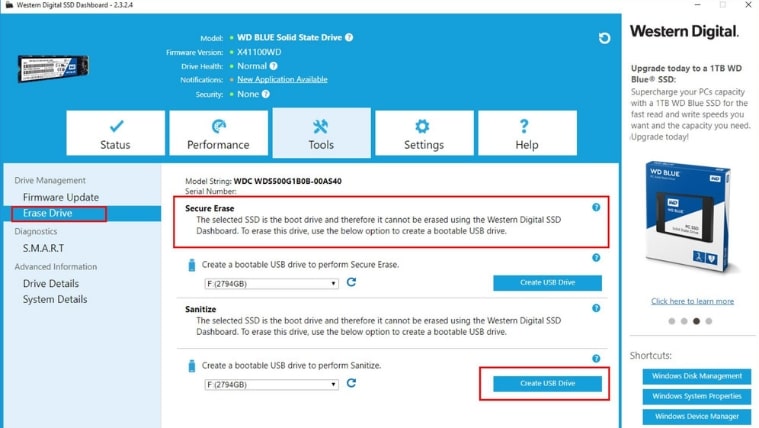
You will use this dashboard to navigate the software and use the various tools and monitors that come with it. The secure erase option will be under the “tools” tab. This will give you a new view with more options.
Select “Erase Drive” from the left-hand menu and follow the on-screen instructions. After this, your drive will be securely erased and you’re free to dispose of it without worry about your information getting retrieved.
However, if you see a message that your SSD is in a frozen security state– like mine in the picture above– then you will need to go through some extra steps to wipe it. Basically, being frozen means it is locked down to prevent accidental wiping. In this case, you have a couple of options.
Wiping a SATA SSD
If you have a standard SATA SSD that supports hot-swapping, you can unplug the power from the drive while Windows is running and plug it back in and it should clear the power state.
Wiping an M.2 SSD
If you have an M.2 SSD, you’ll need to shut your computer down, unplug your power supply, and physically take the M.2 out and re-insert it into your motherboard.
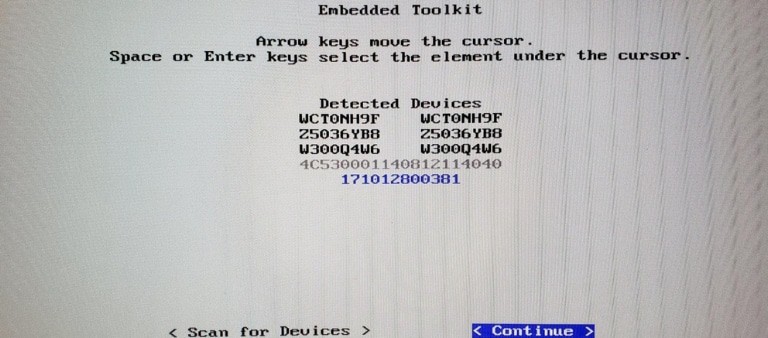
In this case, you’ll probably have to boot to a USB drive and secure erase the drive before Windows starts.
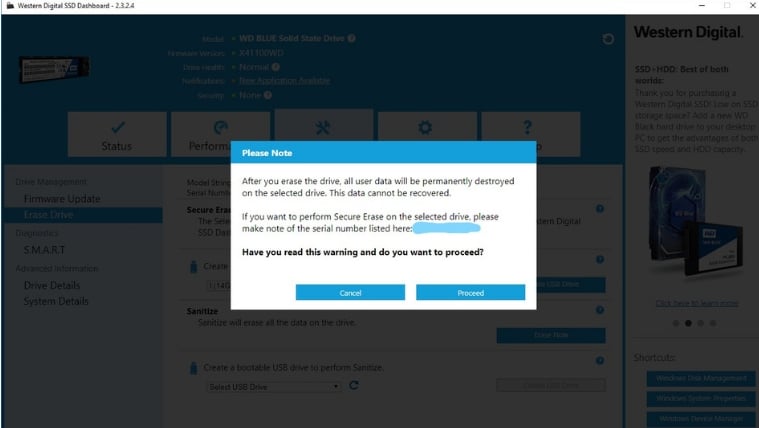
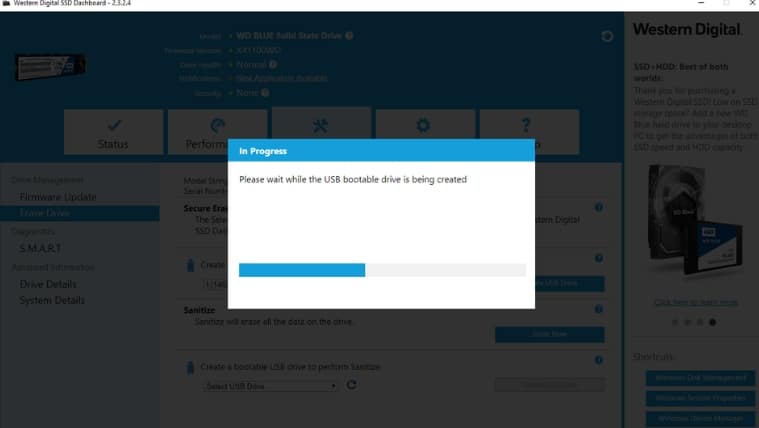
Select “Create USB Drive” from the Tools tab and follow the on-screen directions. Then press “Proceed” once you’ve taken note of your serial number (for RMA purposes on the off-chance something happens).
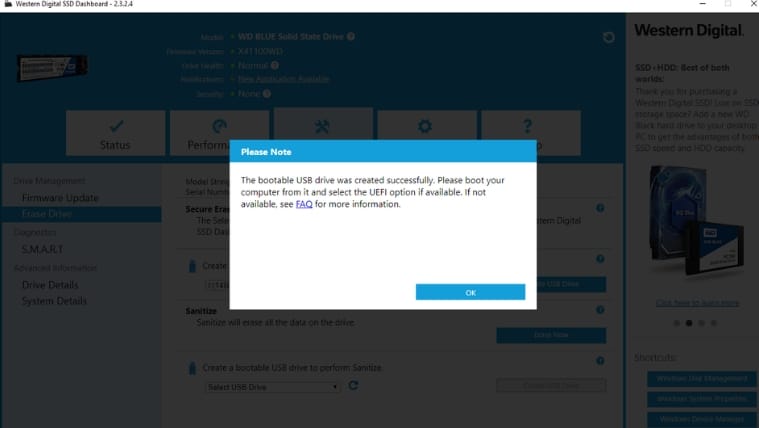
Once the creation is done, you’ll need to insert your thumb drive and restart the PC. You may have access to the boot menu before you can boot to the thumb drive. On an MSI motherboard, this is done by pressing “F11” during computer startup.
You may have noticed it said “UEFI” and not “BIOS”. While we won’t be going over that term in this article, the UEFI is essentially the upgraded form of the BIOS.
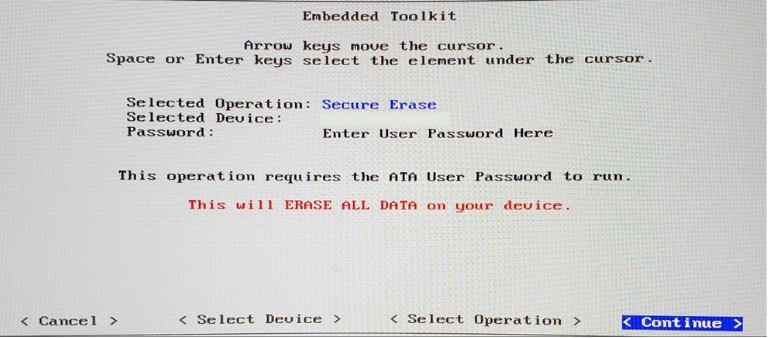
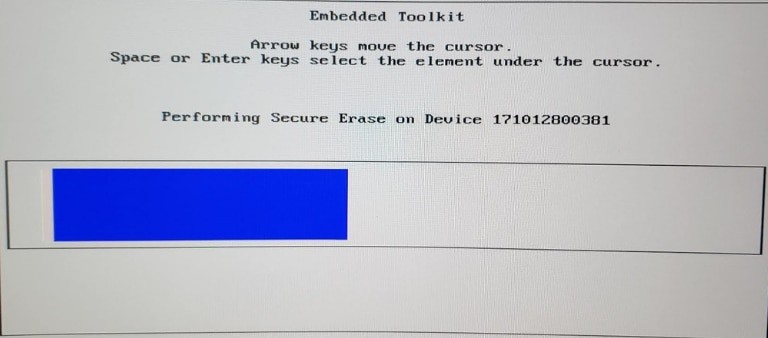
Continue to follow the on-screen instructions.
Once the toolkit has finished the process and successfully cleaned all the data off of your drive, it should reboot the computer and you’ll be left with an empty drive that has no data left to be recovered.
Using the BIOS to Secure Erase
If your BIOS has a secure erase feature, then you may not need to download any software at all (check your motherboard features). I’m using the MSI X470 Carbon Gaming Pro.
In order to access this tool, you’ll have to restart your computer and boot into the BIOS (most motherboard BIOS’ can be accessed by striking the DEL key during startup).
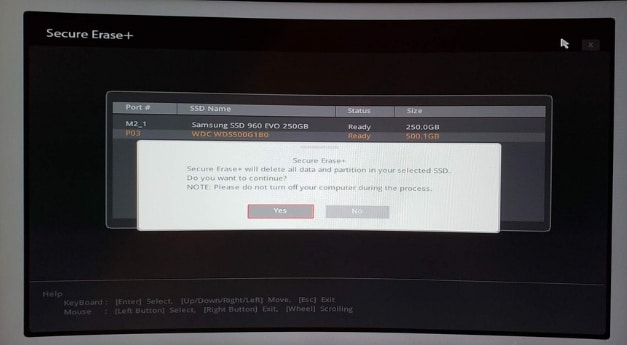
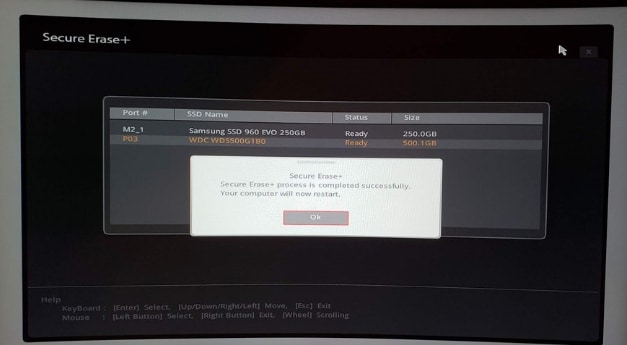
Once you’re in the BIOS, find the setting for secure erase (you will have to look at your motherboard manual to find the exact location). Once you do that, follow the on-screen instructions. It should be similar to my MSI shown in the photos below:
In Conclusion
Secure erasing your data can have many benefits. I mean, allowing you to dispose of or sell an old hard drive without fear of sensitive information being stolen is a pretty big deal.
Usually though, if you’re just looking to clear the hard drive for space and the data you’re getting rid of isn’t sensitive, a quick format would be a faster and more efficient way of doing it.
Now that you’ve learned how to securely erase your data from your SSD, will you be more at ease, and feel better knowing your information is safe from prying eyes?
Don’t forget to leave feedback and let us know if you have any more questions about how to secure erase your SSD!




I got a new pc and trying to do a fresh install of windows, can i use secure erase as a “formating” way to do a brand new fresh install of windows?
Hi Charlie, really nice info. Indeed its a fact that throwing storage devices without erasing the data is not safe as there are many free data recovery tools available which can recover data from the drives even after permanent deletion. To avert such data theft data problems users should erase files and then drop it in the dust bin or sell it to anyone. I personally use File eraser software of Stellar which has 17 algorithms to wipe the entire drives data.
You can also mount the disk as a non-boot disk (need to boot from some other media.) Then use your full-disk-encryption software to encrypt the drive. Don’t bother to keep the encryption key.
Great arrticle … very informative. I was having trouble finding info on wiping SSDs until I found this article. I was able to use the Samsung link to get their SSD management software which includes the Secure Erase. If for some reason that doesn’t work, I’ve got the BIOS method to fall back on.