So you are looking at how to move Windows 10 to your SSD but why migrate? Well, in short, an SSD (solid-state drive) is much faster than their older hard disk counterparts.
SSDs are a bit more expensive than HDDs, but upgrading can be a relatively cheap way to get some extra performance out of your computer. Depending on your storage needs, the cost of SSDs vary, but with storage, you should always plan ahead and get more than you need.
Moving your entire operating system to another drive can seem daunting, but luckily, there are tools that really simplify this task. In this article, we are going to go over a few things you need in order for this to go smoothly. And, of course, a little step by step guide to walk you through the process.
So read on for a faster and quieter system!
Why Move Windows 10 to SSD?
The days of patience are over, so a five minute loading time is widely less acceptable with SSDs featuring in most people’s PCs. Slow HDD load times can be the bane of any computer user’s life, regardless of the task and some games even perform better with an SSD.
SSDs are slowly but surely becoming more and more affordable, so it is a great time to invest and enhance your rig.
What You’ll Need And Preperation
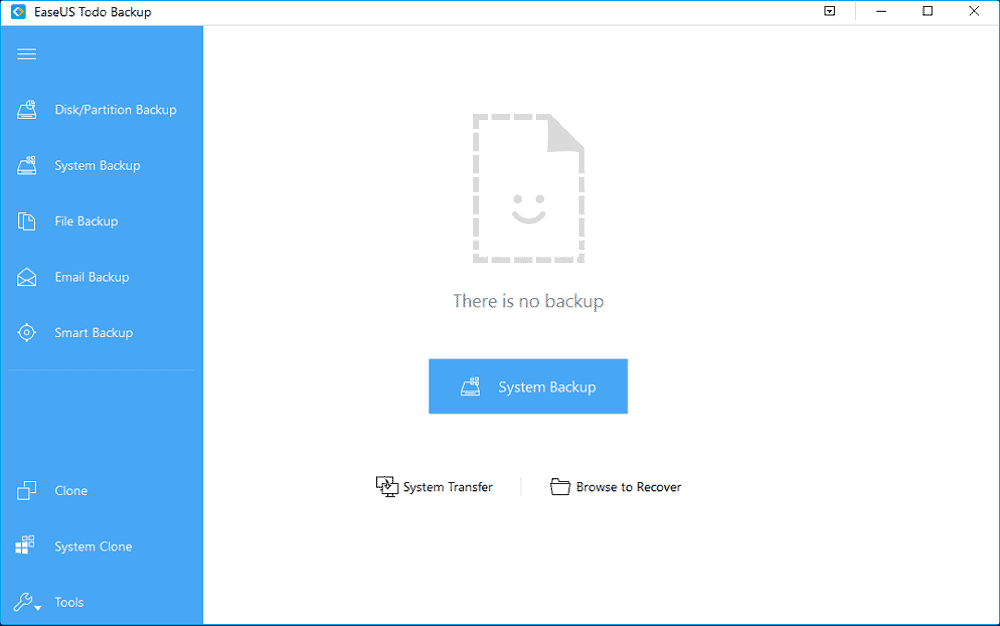
Before you move Windows 10 to your SSD, you are going to need to do some sorting (unless everything is being transferred). To transfer the data in the easiest way, we are going to use a cloning tool. We will be using EaseUS Todo Backup as it is free and simple to use.
Because we are going to clone the disc, it is a good opportunity to defrag the file system first.
- Click “Start” and type “defrag”
- Click “Defragment and Optimize Drives”
- Run the tool and tidy up the disc
Now your file system has been cleaned up; it is worth backing up your data. Use an external HDD if you have one. It is worth noting this may take some time depending on the amount of data you have, and it is just a precautionary step.
Once you have backed up your personal files it is time to begin the process of moving Windows 10 to your SSD. Make sure your SSD is installed, open up the EaseUS Todo Backup tool and let’s get started.
How To Move Windows 10 To SSD
1. Run the tool and select “System Clone” from the left panel.

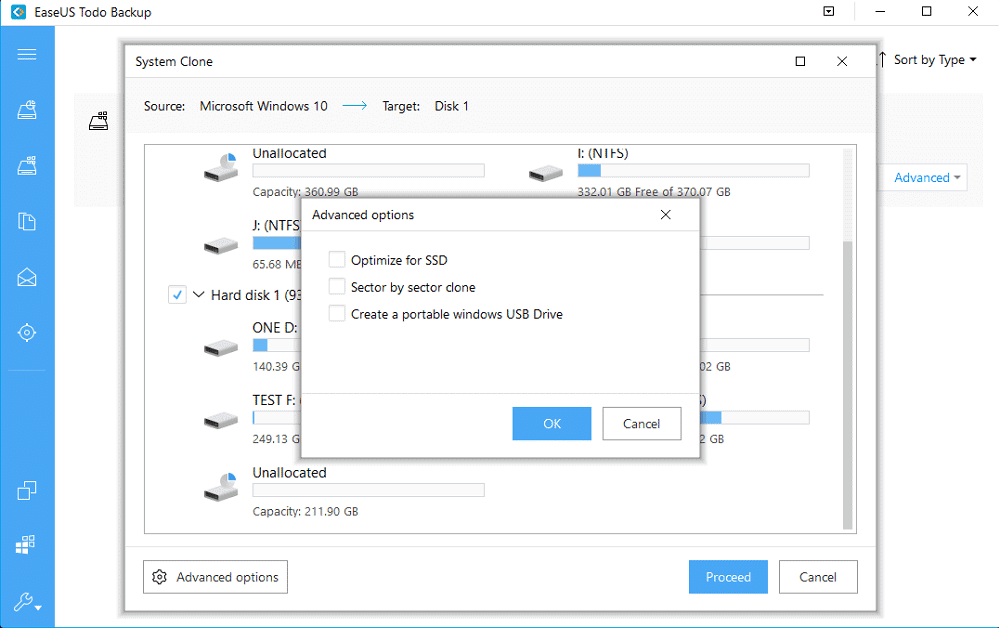
2. Select your old storage device as the source and your new SSD as the destination (this is where your data will be transferred to) and click proceed.

3. Next, tick the box labeled “Optimize For SSD” so the partition is correctly aligned and ensures the best performance.
The cloning tool will now start to copy the data over. If you get an error message notifying you that the source storage is too big, you will have to go back and delete more data from the old disc.
4. Now the data has been transferred restart your PC and enter the BIOS (press F2 or F8 during startup)
5. Once in your BIOS go to boot menu and select your new SSD as the new boot drive
6. Exit, save your changes and restart the PC
Now the process is complete and you have learnt how to move Windows 10 to SSD, you can start adding any backed up files back onto your system.

