
WePC is reader-supported. When you buy through links on our site, we may earn an affiliate commission. Learn more
Last Updated:
A CPU stress test is a fundamental part of CPU and PC diagnostics, and the ability to force your processor to perform can help greatly in the quest for stable overclocks, cooling tests, or for fishing out pesky component faults.
This process is one of the most meticulous tests you can perform on a CPU, especially coupled with trying to balance a stable overclock or determine a component fault. We’re here today to help simplify the process for you.
Stress testing is simple if you have the right tools for the job and know how to read them, and that’s the knowledge we want to impart in this article. But first, a friendly word of caution.
A warning about CPU stress tests

Before we start we should warn you about some of the inherent dangers of stress testing.
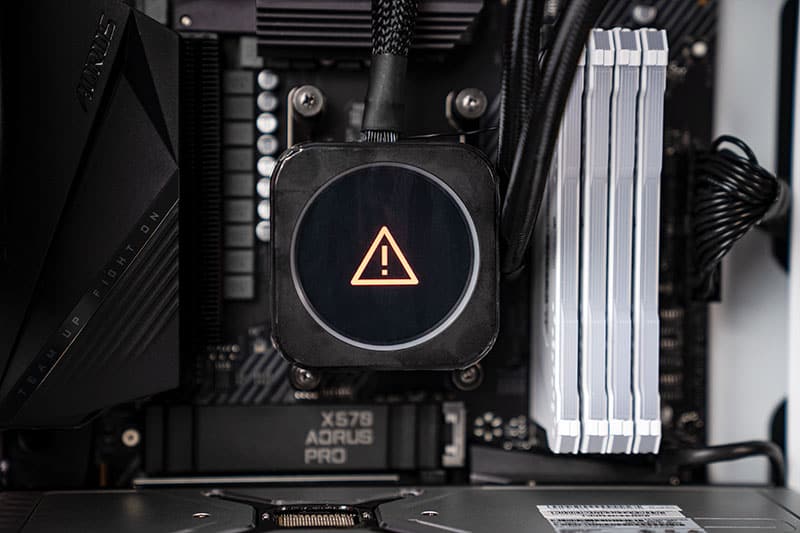
The software detailed in this article is designed to completely load your CPU, ramming it full of so many instructions that it has to work at full capacity to keep up.
Other software can actually push the CPU beyond manufacturer defined limits and has the potential to cause damage to the system if it’s used for extended periods of time. For example, your CPU won’t thank you for dialling in too high a CPU voltage and proceeding to load the CPU for 20 minutes.
It’s important that if you’re going to perform a stress test, that you arm yourself with the right knowledge and take full responsibility for the outcome. Check out our guide to CPU overclocking guide here, we’d hate to see you fry a chip.
If you’re ready we’ll take you through the tools that we’d recommend you use.
CPU monitoring tool
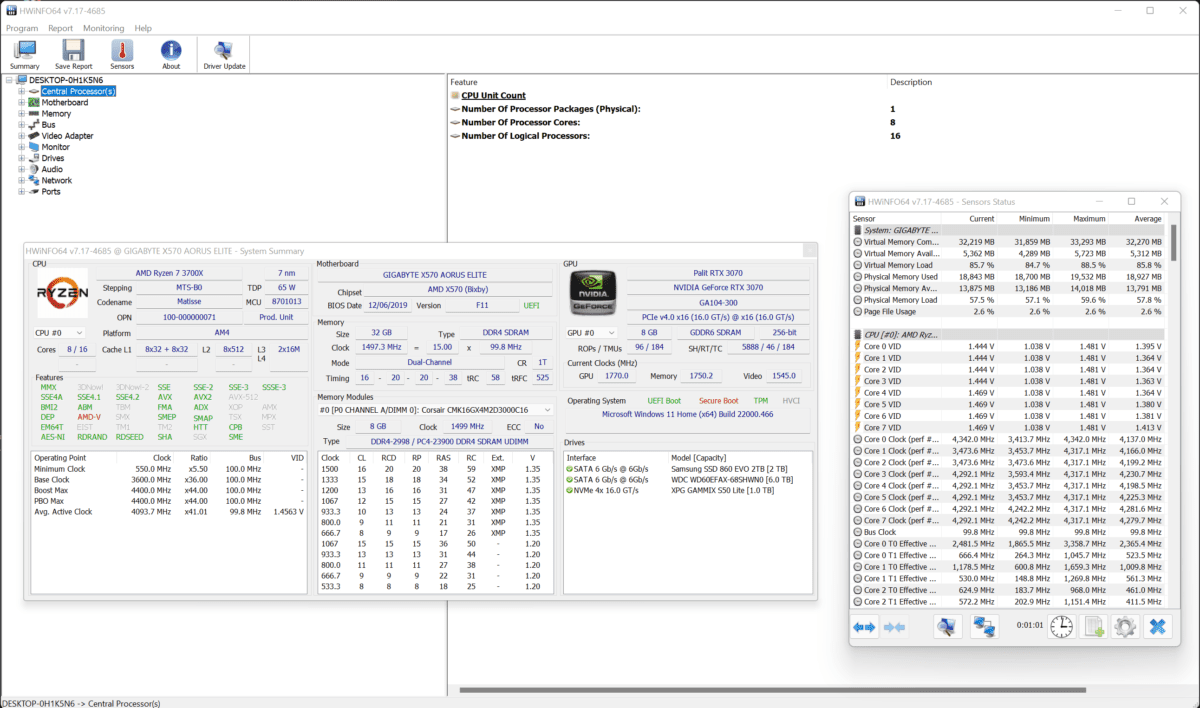
HWINFO64 is our tool of choice for monitoring CPU temperatures, core speeds and more. hwinfo as it’s sometimes referred to is a free monitoring tool that can monitor your whole system in real-time and continues to receive regular updates to ensure it supports the latest hardware.
We’re only going to be using it for the CPU but it’s good to familiarise yourself with this tool as it’s a one-stop-shop for all of your PC’s sensor data.
We’re going to primarily be focusing on temperatures and clock speeds, so navigate down the main window after installing HWINFO until you see the name of your CPU. You’ll find all of the sensor readouts for your CPU here.
There is a lot of sensor data in HWINFO and it can be a little overwhelming, but if you need help you can hover over a sensor with your cursor and get a simple explanation.
To start, we’d advise you to focus on CPU (Tctl/Tdie) and Core Clocks.
CPU stress test tool
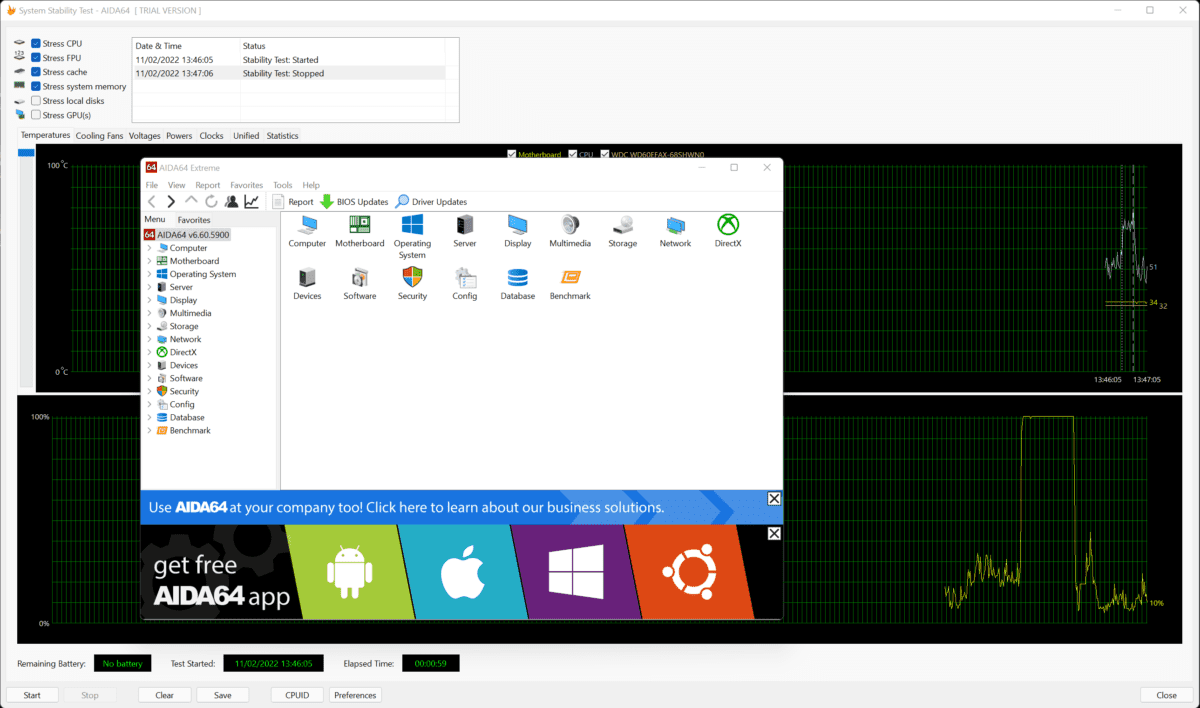
The CPU stress test tool in our arsenal today is AIDA64. There’s a pay version that’s packed full of features but also a free download that suits our needs just fine.
AIDA64’s stress test suite offers a whole host of configurable options and supports a variety of components to perform stress tests on. It offers a memory stress test, a demanding cache load, and a very heavy CPU workload. It can even put your GPU through the wringer.
It’s also possible to log sensor data to your hard drive so you never lose track. You can also monitor AIDA’s readings in real-time with a visually pleasing graph, or even output the sensor reading to a third party application.
Most importantly, AIDA64 is going to call on all of your CPU resources, testing thermals and stability at the same time. Running a benchmark like this produces a lot of heat so it’s a good opportunity to ensure all is well in that department too.
CPU stress test setup
How exactly do you set up for a stress test?
We’re going to outline three of the most common scenarios where a stress test would be required.
- Overclock stability
- Thermal testing
- Component fault
The setup process is similar for all of the above but we’ll run you through them one by one.
Overclock stability
Ensure first and foremost that you have a safe overclock dialled in. If you’re not 100% sure, check again. Now boot into Windows and ensure you close all other apps that may tax the CPU in any way.
Make sure you take note of any overclocks you have set so you can change based on what your settings currently are.
Thermal testing
Ensure your cooler is connected to the motherboard for power and is seated properly. When you launch Windows, close any other taxing applications as we want to control all variables in a test environment.
Component fault
When testing a PC for a fault, you should disconnect any devices or components that aren’t completely necessary. This will help you narrow down to where the problem actually is.
(Tip: sometimes it’s your power supply.)
CPU stress Testing
When performing a test you should follow the Setup step above first, to ensure a proper environment.
Load up AIDA and HWINFO and when you’re ready you can run the stress test within AIDA.
To do this, simply click on the graph across the top toolbar, and once in there deselect every component on the right except your CPU. You’re now ready to run your stress test.
Make sure you don’t leave your stress test running for extended periods of time – 10 minutes should suffice if you’re doing temperature-based testing. Component faults and overclock instabilities will present themselves way before then. When you’re ready, hit the start button.
What to look out for
Now you know how to run your test, we need to run through some of the things that could happen and give you some solutions.
What to look out for: overclocking
IIn terms of overclocking, there are four outcomes that you could experience – your PC freezing, shutting down, bluescreening or passing the test.
Let’s take a closer look at these outcomes.
PC freezes
It’s likely your overclock just isn’t stable. It’s unlikely that you’re causing your system serious harm but this isn’t a certainty. Your best course of action is to reboot and revise the overclock, dialling it back a small amount.
Hard shutdown
A lot of hard shutdowns are reserved for when the PC feels it’s in serious danger or if something goes so wrong within that the PC cannot remain in an ‘ON’ state. You should consider dialling back voltages and clock speeds significantly before your next attempt.
Blue screen
Most Blue screens happen when Windows detects that there’s something wrong with your computer and shuts down to prevent damage. Blue screens are the best fault to have as you’ll get a code that will help you determine what’s wrong. A quick google will reveal the fault and the component in question.
What to look out for: device fault
In terms of device faults, you will generally see the same four outcomes – your PC freezing, a hard shutdown, a bluescreen or a pass.
PC freezes
The PC will likely freeze at hardware faults that no longer allow the PC to sustain an operating system – these are components like CPU, GPU and RAM. These components are most commonly at fault when your PC grinds to a frozen halt.
Hard shutdown
Shutdowns occur most commonly when your power supply is on its way out. Hard shutdowns can be caused by other components but we recommend inspecting the power supply first.
Blue screens
Most Blue screens are common with device faults and will give you a code that you can google to see where the problem lies.
What to look out for: thermal testing
There are two main things that will happen when thermal testing and they’re both temperature based – your PC will either pass the test or you will experience what’s known as thermal throttling.
Thermal throttling
Thermal throttling is a type of defence mechanism against the thermal degradation of components within your PC. When we talk about thermal throttling we are generally speaking in terms of CPU, although RAM, GPUs and even NVMe M.2 drives all thermal throttle when necessary.
Thermal throttling is highlighted by the CPU slowing down its clock speeds and limiting its performance output, thus lowering its thermal output. It’s not ideal if you want a PC that performs – that’s why we perform these thermal tests.
You’ll know when your CPU thermal throttles during an AIDA64 test as the temperature will be in the high 90s and the CPU usage will drop into the 80-70s.
Final word
Stress testing is an important part of PC diagnostics and can be quite complicated if you don’t know what you’re doing. From this base we’ve given you, you can go on and perform more in-depth tests. But, for now, you have a good knowledge of monitoring tools, testing tools, setup, testing methodologies and potential problems that may surface along the way. You also know how to do CPU stress test simply and efficiently.